So you've seen those GW cases and you want something nice and solid to keep your army safe. But then you see the prices for new ones, and notice all the second hand ones have one clasp broken for some reason, and you think, "There's got to be a better way!". Well, there is!*
(* for some values of "better". There will be effort involved.)

So I think I had read on a forum, or in a Facebook group, that Bunnings here in Australia (a hardware chain store) had "safe cases" that were hard shelled, and came with foam inserts. Or maybe I dreamed it, who knows? Suffice to say the prophecy was a true one, and I toddled along to my local Bunnings and picked one up to have a go at turning it into a transport case for my Kings of War army. The specific case I got was "Craftright 465 x 360 x 175mm Safe Case", at AUD$49 at time of writing. You'll also want a snap blade knife (the box-cutter types that you can extend the blade right out to 10cm or so - eg "Craftright 18mm Snap Off Knife") and some spray adhesive ("Boyle 350g Clear Spray Adhesive" from the craft section of Bunnings).
Now my Undead, being my only actual playable army at the moment, was almost all individually based models, magnetised to unit trays. My initial thought was to cut holes for each individual model, and slot them in. But then I thought about how many models that was each game for set up and pack down, and decided instead I wanted each unit to have a whole slot to itself so it can be picked up and put down. Additionally, this will mean I can fit more models into each case as I will not need too many compartments which waste foam space between them. I had a few trial and errors going in, but below I will focus on telling you what worked, rather than talking too much about what did not work. The below method works even better for multibased units, which I found out after making such a unit.
Step 1: Lateral slicing
Each case has two layers of foam. One is a solid layer, and the other is a "pick-n-pluck" piece that has semi-pre-cut 1cm squares in it. For each layer, you'll want to use a sharpie to draw a line half way deep in it, all the way around all four sides. You'll then use that line as a guide for your knife. At this stage you will want to make sure your units are actually not much taller than half the thickness of the pick-n-pluck layer. They can be a few mm taller as they will be just pushing into the next layer of foam, but not much further as they will likely bend or break when the case is closed. If you have some shorter units and some taller units, you might want to cut the pick-n-pluck foam layer at an uneven depth, so the thicker side becomes the layer for the taller units, and the thinner layer for the shorter units. The solid foam should be cut evenly regardless as it will just be the base of each new layer. You basically want to turn two layers into four layers.

Extending the box-cutter blade all the way, saw your way around each layer laterally to cut it into two halves, like two foamy pieces of bread. You will need to do several laps around, pulling the wound open, to get deep enough to cut all the way through. Always cut away from yourself, use fresh sharp blades, etc etc. If you have done any hobbying before you should know the safety stuff back to front by now. Do not do this on your lap.

Repeat this for both the solid layer and the pick-n-pluck layer.
Step 2: Glue
Take one piece of the solid, and one piece of the pick-n-pluck. Spray one large face surface of each liberally with the spray adhesive.

Put the two sticky faces together, and then slot them back into the case, pushing down gently but firmly to make sure they have full contact.
Repeat for the second pair, and put them on top of the first pair in the case. You should then have two separate layers, each one a pair of solid and pick-n-pluck pieces. The solid piece will be the base of each of your layers, and the pick-n-pluck will be the layer you cut your unit shapes into.
Close the case to push the pieces together and leave to dry overnight (or a week, like I did because I was busy). While like this, leave the little knob valve on the front of the case near the handle open so some air can get in. And so fumes can get out. You'll probably want to leave it in the laundry or shed.
Step 3: Cutting unit sizes
Take the layers out of the case and put your knife against the side, as pictured. Extend the blade exactly far enough to extend through the whole pick-n-pluck layer, and no further. Pull the little lock tab back on the blade slider to make sure it does not change.

Next, mark out the size of the unit you want using your sharpie again. Use the corners of the pick-n-pluck as guides, making each slot slightly bigger than the unit base (to account for weapon overhangs, and let you get your fingers in there to pick them up).

Between each unit's slot you should leave two rows of pick-n-pluck. I left just one on a few of mine and they flex and come away from the base layer too easily. I therefore recommend two full rows minimum, as pictured.

You then cut around the outline of the slot using your knife, following the pick-n-pluck guides. Like using scissors to follow some perforated paper. Do not do this on your lap, either. A table with a cutting mat is a good idea. Or a workbench.
Once you have cut the outline, just gently grab chunks of it and pluck them out, holding down the walls near where you are pulling so the rest of the layer does not separate.
You should then end up with a slot just the right size for your unit, and a handful of spare foam.
Step 4: Store
Then just put your unit trays wholly into each slot. You can see in the picture below some of those single thickness walls already giving way. Make sure you double up those walls!

If the slots are the right depth to match the unit, the layer above will push gently on their heads to stop them sliding around when the case is closed.
If you made a slot for a really big unit, you can also put in two units instead if you do not want to take that one big unit today. You can buffer between them with pieces you have plucked out.
If you have holes deeper than the units you want to put in, again you can use pieces you plucked out. Lay thin layers on top of your unit to add height to stop it moving while in transit.

Some units might go in better lying down. This is usually the large infantry regiments or infantry troops, where their unit base depth is not much compared to the model height. Make sure you put the base towards the hinge for best support when picked up.


Heroes are often awkwardly tall and full of sticky-outy-bits (to use the technical term), so you can cut custom slots to fit them laying down perfectly. Again, bases towards the hinge.

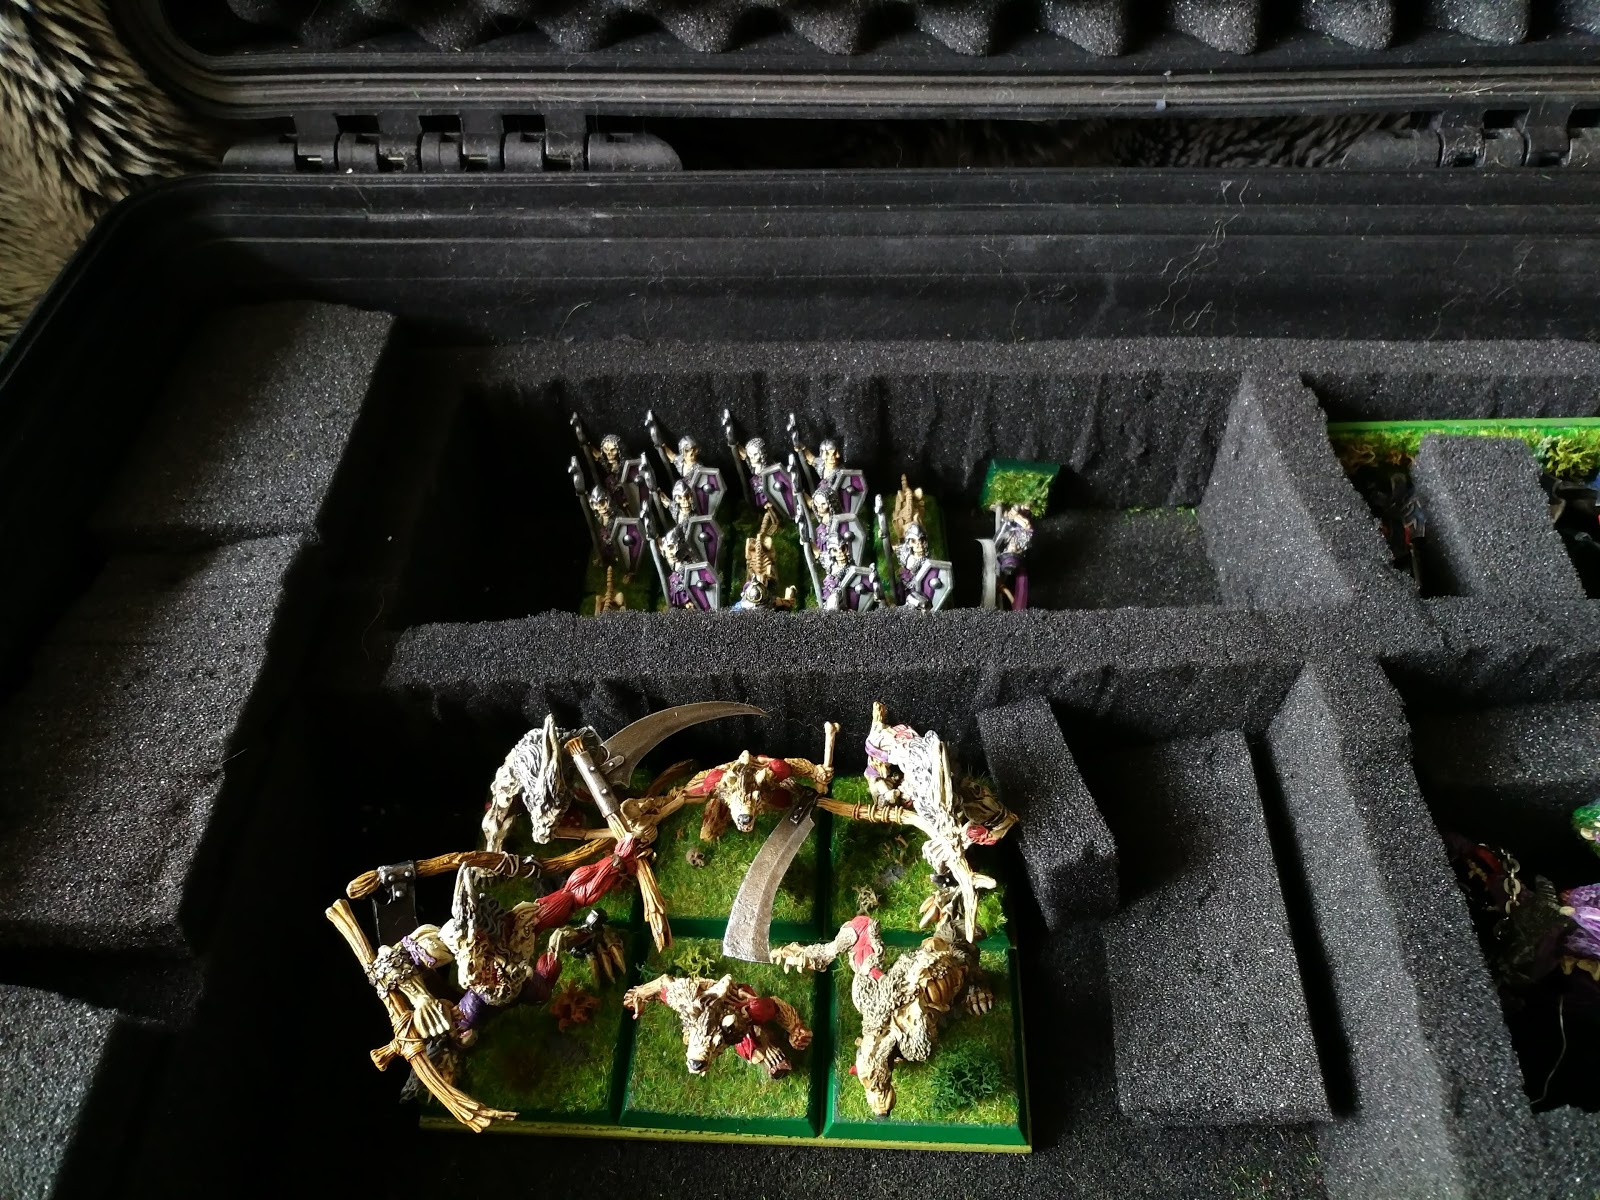
The second case I cut to two depths as described above. The top layer I can use for laying down a troop of cavalry (they can come off their unit base as they are magnetised), or just holding my spare unit bases (which are useful for trialling unit movement in-game without moving the actual units). The lower, deep layer is the one previously shown with the werewolves. The individual slots in the top layer were for the soul reaver infantry before I multibased them.


To personalise the tray and cases, I googled up a skull stencil, printed it out, cut the design out with a scalpel, and sprayed in silver on them all. You can see it in the first picture on the cases.
Bunnings also have a larger case (seen upright in the first photo without a stencil - "Craftright 515 x 435 x 225mm Large Safe Case", AUD$72 at time of writing) which I have bought for my next army, which is likely orcs and will need deeper slots than my undead. Hopefully it works out (I am only up to step 2 with it so far).
Nice tutorial there, I might have to check out Bunnings...
ReplyDeleteWhere does a general keep his armies? In his sleevies.
ReplyDeleteClassic. Right up there with "where does a pirate captain keep his buccaneers?"
Delete